Thursday, June 25, 2009

One more graduation Ian...

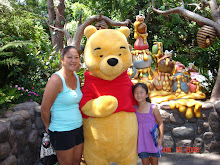
here's a very short post today...as I am leaving for VEGAS today!!! so I will be missing in action from now until I return...I will be busy also getting ready for my cousin's graduation party, so I don't know if I'll have a chance to post until the second week of July! I will definitely try though! my mom needed one more graduation card for a boy who graduated from Kaiser. So their colors are blue and gold...here's what I came up with!
these TGF images really came in handy this year!~ I loved using him to add such a personality to the card! I even loved adding my own tassel to it! I used the cuttlebug embossing folder too. pretty simple, but perfect for a fast card!
have a great weekend everyone!
I will enjoy myself being off this island!
can't wait to catch up with all you folks when I get back!

Wednesday, June 24, 2009

Matchbox creation...

so I got a cute matchbox from my BFF and so I wanted to create one myself...I don't know what I was thinking, but I tried my best! I made my own measurements for this because what I wanted to fit inside...it had to be this size...so let me try to remember the measurements for you...the bottom of the box is...7" x 7"...score 1 1/4" on all sides...
you will cut the tabs...only 4 score lines that intersect. I took a picture so that you could see what I was talking about...those 4 tabs you'll put double stick tape to make the box.
then you'll get a 4 1/2" x 12" DP...score at 1 1/2"...6"...7 1/2"...the edges should just meet...if you use a thin DP, you may want to use CS to reinforce it at the same measurements. here is what the matchbox looks like when pulled out...
I used the labels one nesties for the opening...I even used acetate to make the window. I used my favorite flowers...hydrangeas and the punches w/ sentiment from SU. I added the ribbon to hold it closed and there you have it! oh my...I think I did another tutorial! lol!
have a great week everyone!

Tuesday, June 23, 2009

Japanese Hello Kitty Match Box...

here is an original creation...I love this matchbox...and so with that I created my very own! I will have a tutorial on this for the next post...if you all went to check out Enjoli's blog...Stamping under the sun...she had made a Hello Kitty off their new line...which now I have to go out and look for that one...she's purple =) she gave me an idea! I decided to make a Japanese Hello Kitty...well...she's with the sakura flower on her eye instead of the star!
here's an up close of the Hello Kitty face I made...I added some sakuras around her too! I am making this for a friend who will be going back to Japan...that's where she's from and her visa is up...so it's time to return. I wanted to make her something special and she loves HK!
I made some jumbo paper clips...
here I made a note pad with mimmy and I used the new stamp set from SU called Circle Circus. it reminds me of the japanese card game...Hanafuda. I added a sakura to her bow.
here I made her a coaster post-it-note...added the natural flower to her bow...
last but not least...I made her a card with the hula anya...she used to take tahitian in Hawaii Kai somewhere, so I wanted to make a card for her to remember the fun times here in Hawaii.
the month is almost over! can't believe it that we are half way through with 2009~! as always... I want to thank you for stopping by and leaving me such positive comments!
enjoy your week!

Monday, June 22, 2009

My June OCS...

I finally made my OCS for this month...I know I should have made this sooner, but I hope she received this over the weekend! Sorry Tia...I forgot to write a little note inside it to say that you can use it if you want...that's why I left it blank! I am so happy to say that I got to use TGF rock the farm anya stamp! this is the first time I used her and I loved it! I wanted to use red for some reason. so I used my copics...red, pink and yellow to color her. I added pink bling to all the flowers on her bandana, the ribbon in her hair and the buttons on her overalls.
here is my finished card...yes...it's a shaker! this one came out really great! I had fun making this one! I added the flowers I love to use...and I used a sentiment from SU. I used my nesties for the opening and the frame around the opening.
here is a side view so that you can see the microbeads...
I used red, pink and gold beads for my shaker!
happy Monday everyone!
thanks for stopping by and have a great week!

Friday, June 19, 2009

Desktop post-it-note holder tutorial...

here I go...I promised a tutorial on my desktop post-it-note holder...this is how I make it and others may find it easier to do it a different way...I just wanted to share the instructions of how I make it with you! So, first you will need a 4x6 plastic frame...you can buy these at Longs...they do go on sale for really cheap! you can purchase the ones that are vertical or horizontal. the CS is 4x6 and the DP is 3 1/2 x 5 1/2. you can use the 3 x 3 post-it-notes, flowers for the top, dew drops if you want to add them and your sitting image.
so take your CS as your base and tape down your DP to it.
here you will insert the CS w/ DP inside the front of the frame.
this is what it will look like once it's inserted..
now...you must put double stick tape on the back of your post-it-note before you stick it down...this will insure that your post it will stick to the frame =) this one's for you "K"! I know you know who you are...lol!
here's what it looks like once it's taped down on the front...
you can use anything to decorate your frame...I used the natural flowers. I also used the fabri-tac to stick them down...this glue is exactly like a hot glue gun, but without the heat and never having to worry about burning yourself in the process. Just hold the flowers down for about 30 seconds and it should be stuck down.
you can place them where ever you want to...I do them like this, but leave a little space on the top so you can add your image to it.
here I used the double stick foam tape...you can make it as long as you like but remember that it must be hidden behind your image. I used 3 layers of the double stick foam tape, so that my image is up above the flowers and it gives it a look like she's sitting among the flowers =)
this time I decided to use a sitting Tilda! she's sitting among the flowers!
I added my dew drops to the corner...
here's the up close of what Tilda looks like...sitting in the flowers =)
okay gang...was that easy or what?! now you go out there and create, create, create! I used my copics to color this sitting Tilda...got the base flowers from Roses on Paper, the other flowers from other stores...if you have any questions, don't be afraid to ask! well, thanks for stopping by today...yipee!!! it's FRIDAY! have a great weekend everyone! my tutorial will be posted on my sidebar for future reference...under tutorials!

Thursday, June 18, 2009

Altered Crayon Box...

so I saw this tutorial on Tammy's blog...Fun Paper Candy...she has the link to this cute crayon box...but I linked it to this: crayon box tutorial. it's the easiest thing to make and it holds so much things...I made this one for my BFF. I put two TGF stamps inside. I also used DP for the outside and ribbon for the handle. I decorated the outside with miss cutie patootie Tilda! I added some flowers to show she's sitting =)
here's an upclose picture of what I did...
I used my copics to color her!
here's what it looks like when it's opened. I used the velcro dots to close the flap. this is so easy to make and what a great fast way to give a RAK! I made another one to hold stamped images...I haven't given it to this person yet.
well...we made it to Thursday!
these weeks are going by fast!
Enjoy and as always...Thanks for stopping by!

Wednesday, June 17, 2009

Tia...my OCS!

isn't this just beautiful?! I received my OCS in the mail the other day and I was so happy to see that she used my favorite gorjuss girl & my favorite color...purple! Thank you so much Tia!
here's what it looks like when it opens up! it's a slider card! I love it! I tried to make one, but I have to be taught this card again...oh wells!
love this OCS (one card swap)...if you would like to join...go and check out Teri's blog...Big Ideas from a little girl...she will post the next OCS for the month of July soon!
thanks for stopping by today! we are almost there...half way through the week!

Tuesday, June 16, 2009

gift box and cupcake card...

last weekend I had to go to a baby's 1st birthday party! no matter how many boxes and bags I may have...for some reason I don't have one that was just right...so I made my own. sorry gang...I had to make it in a rush...I don't have the measurements to share. but this is how it turned out? I know I made the bottom a little bit smaller than the top.
I used the DP from designer digitals...I put the DP on the top of the box as well as all the sides on the bottom part of the box...can't really see it in the picture. I added some pretty flowers and ribbon and topped the box off! of course I made a card...
the little girl's theme for her birthday party was cupcakes...so I made this card just for her! I used that one jumbo cupcake stamp from SU! paper pieced the bottom half of the cupcake...I also used the polka dot background stamp from SU as well. I used some pink bling for her sprinkles and I used crystal effects on the cherry!
I had a good time at this party...I did make a lot of things for this party, but didn't take pictures of those...100 cupcake tags and 50 cupcake gift card holders! hope everyone is having a great Tuesday! appreciate all those sweet comments!

Monday, June 15, 2009

Mini Double Shakers...

I love a challenge...and a couple weeks ago I was given some...let's say "scraps" to use and so I told the girls that I would do my best to try and make something. I was given the middles of some of the thick foam to make the double shaker boxes. I said I would try to make mini shaker boxes...this is how they turned out!
here's a pink one...I love the new DP from designer digitals...I use them so often now...but it's a lot of ink from your printer to make these =) I also used those Ketto images...I got them from Kyoko...thank you my dear! used some PTI ribbon & CS too!
here's a purple one...I used natural flowers and microbeads for the front...dew drops for the back and colored the girls with my copics.
this has been a fun and wonderful challenge!
I had a great time making these mini shakers.
the girls were a little hard to cut out, but they are so cute!~
thanks for stopping by today...it's a new week!

Sunday, June 14, 2009

BLOG CANDY WINNER...

so here we go again...sorry I know I said I would update it on Wednesday, but the week gets hectic at times...so I finally got a chance to do it today...here's a picture of my daughter ready to pull 3 names out of a bag...this seems to be easier =)
here are the three names she picked...
Cami
Jen
Linda
and the winner is JEN!
Congratulations!!!
Thanks to all who played...sorry it seemed to take so long!
Jen, I will send you your stuff out on Monday!
I will be having another blog candy real soon. I will make one year of blogging in July!

Thursday, June 11, 2009

All I can say is WOW...

I cannot say this enough...that I am truly blessed by all the wonderful blogging sisters I have found through this blog! I have been touched by these wonderful women who love to share...not only RAKS of goodies, but also their kindness and their hearts! Thank you ladies for being so awesome and so sweet! this first one is from Jodi...Inked Inspirations! what a wonderful surprise came through the mail! I was so shocked and touched! look at this lovely card! Jodi is so talented...please go and check out her blog! look at all the stuff that came with this beautiful card! I can't believe it Jodi! thank you so much! I received so many stamps...bling and paper! WOW! I am speechless!
here's a cute little box that my BFF made me. she filled it with goodies too! isn't this box so adorable! I need to learn how to make this! thank you Michelle!
I was blessed to be a winner of TGF stamps that Tammy...Fun Paper Candy was giving away! when I received it, look at this awesome card that came with it! I love it! so awesome! if you have time, please go and visit her blog...she does some great projects! Thank you for my goodies!
hope everyone is having a great week!
today is Kamehameha Day!
I can create and relax and do something fun!
thanks for stopping by!

Wednesday, June 10, 2009

Last teacher gift...

I wanted to try that box that Joy's of Tamikos kept making...it look so cute! I didn't realize how big it is...I didn't have too much time to make this...so I didn't have really anything to fill this box with! I know that Taelyn's teacher loves HK and so I used those sizzlit dies. I also bought some of the new DP from designer digitals...so you can print out as many as you want. I loved the paper I bought!
here is the card I created with...of course...the HK! used the natural flowers I love so much! used that lovely DP and the ribbon is from PTI!
I have some of those business card holders...but this one has a note pad inside...used that pretty DP that already has glitter on it and added that sizzlit...mimmy w/ purse.
didn't know what else to make...so I ended up making those big paper clips to add to the box. I didn't know what to use to design them...and then came up with the natural flowers.
I ended up making six of them to add to the box...
hey everyone...we made it to the hump of the week!
for those of you who work for the state...it's King Kamehameha Day tomorrow...so that means a day off of us...yay!!! Enjoy your day!

Tuesday, June 9, 2009

Iolani graduates...

***update...the winner of the blog candy never claimed her prize...so that means...we will be picking another winner! yay! stay tuned for the next winner!***(I should post a winner by Wednesday 6/10/09)...now on to my post!

I also had to go to Iolani's graduation...the same night of HBA's but their graduation was at 5 pm so right after my family headed over to Iolani...I had 4 boys there. They all play soccer with Marc for the bulls...so this is a really special bunch of kids!
here I made a double shaker but for a card...this one really stuck off the card. I had to do that because of me using the real tassel for his hat...sorry for the flash off the window. I used graduation Ian on most of my cards...
here's one that you can see the graduation Ian...I used red and black and I found the Iolani logo so I made sure I used that as well.
this one I used the cuttlebug embossing folder for the background...
ran out of printed graduation Ians...so I decided to use a old SU stamp set...got the cap and used the tassel on that one...
thanks for stopping by and sharing with me in all my graduation creations...I will have different stuff to share later in the week! have a great week everyone!
Related Posts with Thumbnails